
Say Goodbye to Stringing: Top 5 Tips for Perfect 3D Prints
- Matthew Zaino
- Dec 13, 2023
- 6 min read
3D printing opens up a world of possibilities, but it's not without its challenges. One issue that creators encounter is the puzzling phenomenon known as 3D printer stringing. Imagine this: as the printer nozzle glides through open space on its way to the next destination, it occasionally drips molten plastic. The result? Thin strands of plastic that cling to your printed masterpiece like cobwebs or strands of hair.
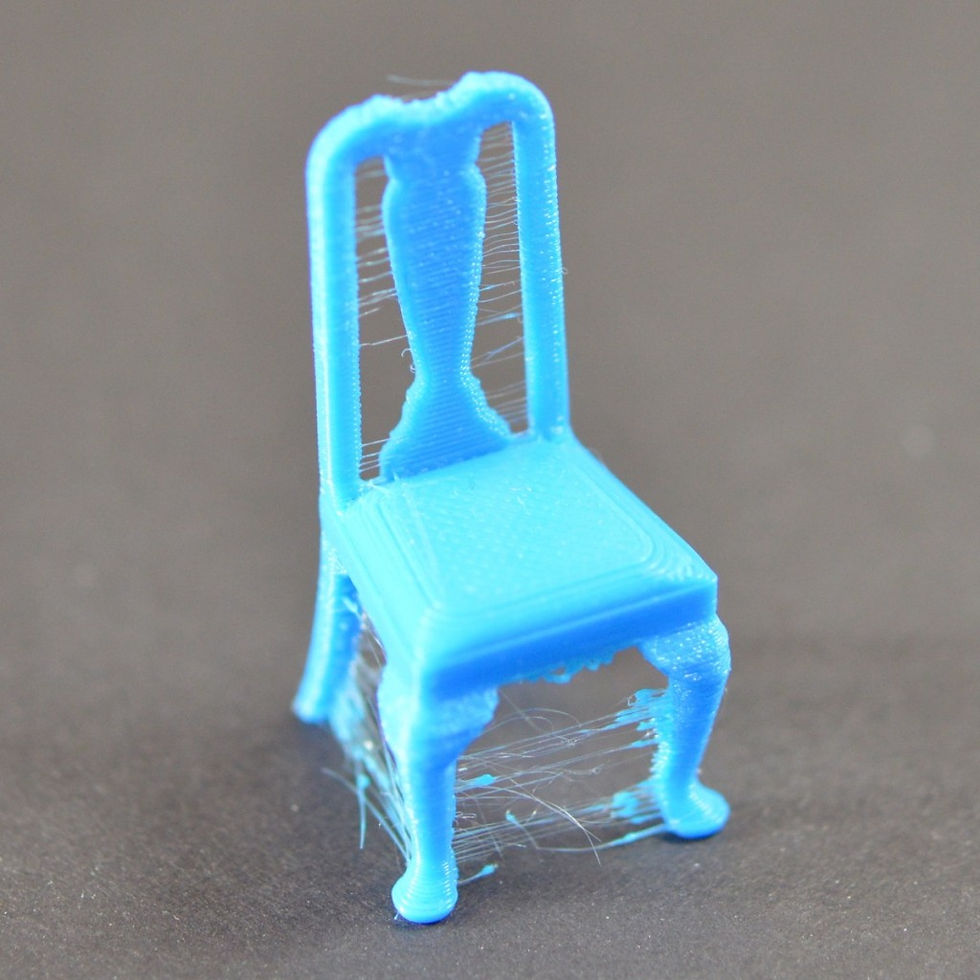
In an ideal scenario, the nozzle should gracefully traverse open air without leaving a plastic trail, a maneuver commonly referred to as a travel move. However, reality often paints a different picture, with molten plastic reaching unintended areas, decorating your prints with peculiar "whiskers."
The primary issue behind this problem is the incorrect retraction settings and excessively high hot-end temperatures. As a side note, Adjusting the retraction speed involves determining how quickly the filament is pulled back into the nozzle. Opting for a higher retraction speed permits shorter retraction lengths, ensuring optimal results without significantly increasing printing time. Notoriously, materials like PETG demand higher temperatures for melting and are prone to stringing. Yet, even commonly used materials like PLA and ABS aren't exempt from this quirky issue.
Thankfully, 3D printing offers practical solutions to combat stringing. In this article, we'll explore five simple strategies to prevent and overcome the challenges of 3D printer stringing. So, let's dive into the solutions and ensure that your 3D-printed wonders emerge free from the clutches of those elusive strands. Ready to untangle the web?
1) "Mastering Precision: Unleashing the Power of Retraction in 3D Printing"
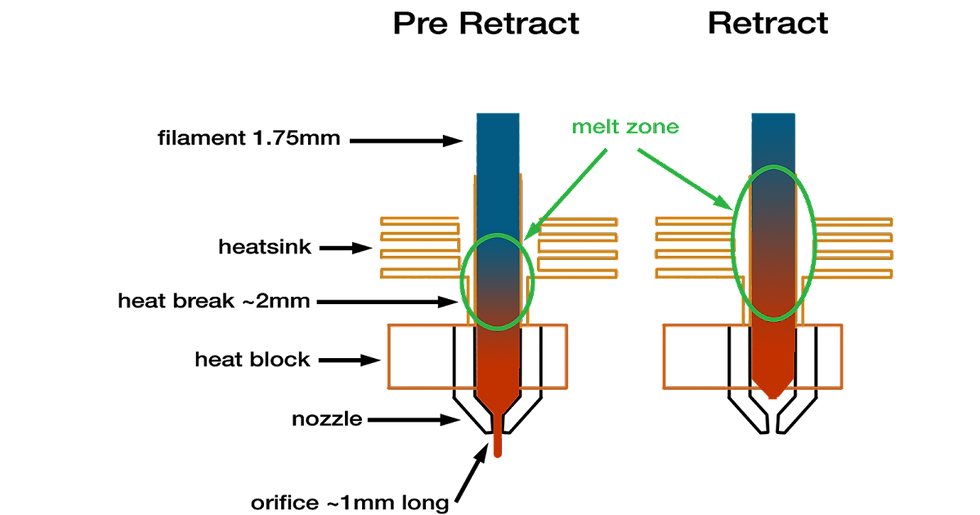
Mitigating 3D printer stringing is commonly achieved through the implementation of retraction, a process where, when the extruder traverses a gap, the feeder slightly pulls back the filament. This prevents molten plastic from trailing as the printer head moves, acting as a countermeasure against oozing. While retraction is typically enabled by default in slicing applications like Cura, it is advisable to confirm this, especially if stringing issues arise. If problems persist despite retraction being turned on, adjusting the detailed retraction settings may be necessary.

Retraction Distance
The ideal retraction distance isn't a one-size-fits-all metric. The type of extruder you're working with can influence this critical setting. Due to the extended gap between the nozzle and the drive gear, a Bowden setup's extruder typically demands a greater retraction distance.
Determining the perfect retraction distance often requires a bit of experimentation. One practical approach involves conducting test prints. A retraction test print, for instance, proves to be a swift and economical method, providing insights without devouring excessive filament.
Retraction Speed
Retraction speed plays a pivotal role in preventing the notorious 3D printer stringing. A faster retraction speed minimizes the chances of filament oozing. Yet, excessive speed may lead to filament disconnection, nozzle jams, or areas where filament fails to deposit. The quest for the ideal retraction speed is a balancing act, requiring a delicate touch between slow and fast.
This sweet spot varies with different printing materials. For those navigating the intricate world of retraction values, programs like Simplify3D come to mind with pre-configured profiles. These are an excellent starting point, especially for those seeking the right retraction speed. Knowing your extruder and printing material is the first step in determining optimal values. ABS and PLA do well with speeds ranging from 40 to 60 mm/s and retraction distances of 0.5 to 1.0 mm on direct drive extruders. Meanwhile, Bowden setups demand a slower speed of 30 to 50 mm/s and a longer retraction distance of around 2.0 mm.
Flexibility is vital, as these figures are subject to change based on numerous variables. Slicer programs like Simplify3D introduce advanced parameters such as "coast" and "wipe" to refine retraction values. Wiping clears leftover plastic by moving the nozzle against the outer wall, while coasting reduces pressure buildup in the final moments of the print line to prevent imperfections. Cura offers additional settings like "Retraction Minimum Travel" to avoid unnecessary retractions and "Combing Mode" to control travel moves.
All retraction settings reside in the "Travel" dropdown, ensuring a comprehensive approach to fine-tuning. When a retraction is executed precisely, it ends stringing and offers creators unparalleled control over their 3D prints.
2) Calibrating to the Right Print Temperatures
Temperature control emerges as a critical factor influencing the viscosity of printing materials and the likelihood of unwelcome drips from the nozzle.
Picture this: as temperatures rise, printing materials transform into a more fluid state, increasing the risk of nozzle drips, even with meticulous retraction adjustments. A lower nozzle temperature serves as a safeguard against these wayward drips. However, it's a fine line to tread, as setting temperatures too low may impede filament melting, leading to extrusion challenges.
Pinpointing the perfect temperature is nuanced and contingent on the specific printing material and other contextual print settings. A general recommendation surfaces: consider lowering the nozzle temperature when stringing becomes apparent. Incremental adjustments can be experimented with, typically in the range of 5 to 10 °C. But a word of caution: never dip below the manufacturer's minimum specifications to avoid potential complications. For those seeking a starting point, here are commonly recommended nozzle temperatures for some of the most popular filaments:
- PLA: 190-220 °C (60*C print bed)
- ABS: 220-250 °C (90-110 °C print bed)
- PETG: 230-250 °C (60*C print bed if needed)
- TPE: 210-260 °C (20-110 °C print bed)
- PVA: 160-215 °C (60 °C print bed)
-TPU: 210-230 °C (30-60 °C print bed)
These figures are guidelines; variations may occur based on specific material brands and printer models. With thoughtful adjustments and adherence to manufacturer specifications, you can strike the perfect balance, ensuring a fluid yet controlled printing process. So, let the temperatures guide your masterpiece to perfection.
3) Taking into Consideration the Print Speed
The velocity at which a 3D printer operates plays a crucial role in the occurrence of stringing. If the nozzle's movement between points is prolonged, molten plastic may ooze, leading to stringing. Conversely, a faster extruder can prevent oozing by swiftly completing short moves. Adjusting the nozzle's travel speed during non-printing phases can minimize stringing, although caution is necessary in cases of low temperature and high print speed to avoid extrusion. While a speed range of 190 to 200 mm/s is generally suitable, MatterHackers identifies 150 mm/s as the optimal travel speed for most printers.
As a creator, you must confirm your printer's speed settings before modifying. The speed of movement along the X/Y axis, indicating lateral travel, directly influences how long the nozzle will traverse a given space. Notably, Simplify3D features a function that shortens travel paths to reduce oozing, while various slicer packages, including Cura, provide options to accelerate the nozzle during non-printing movements.
4) Clean the Nozzle Before Starting the Printing Process.
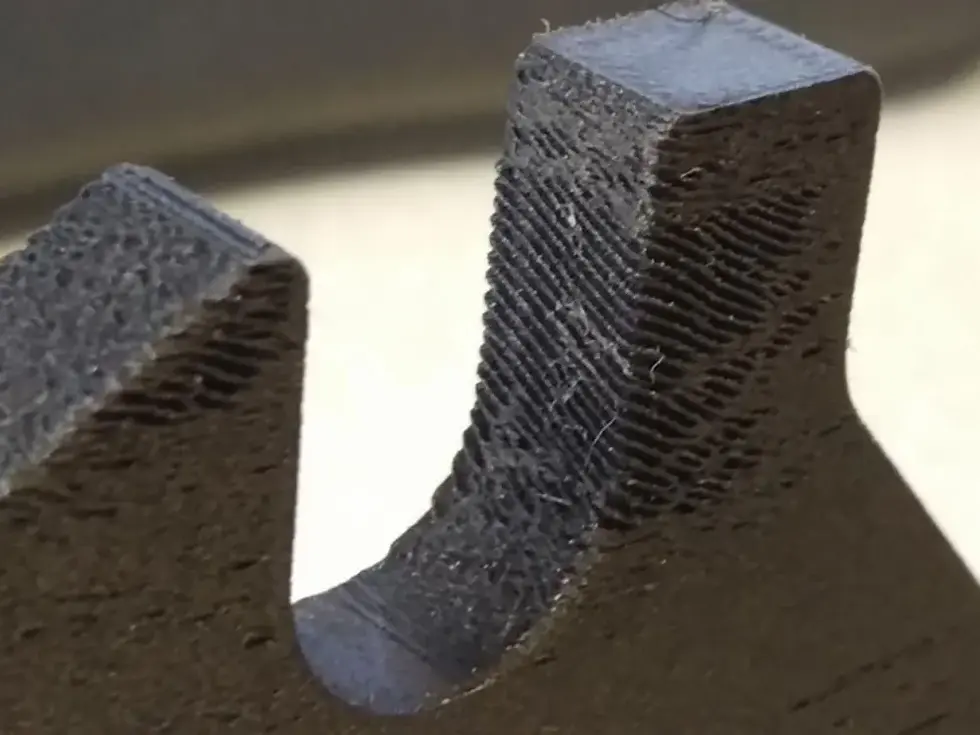
When operating a 3D printer extensively, especially with a single material like PETG, filament residue can accumulate inside and outside the nozzle, potentially causing 3D printer stringing. To prevent this, thoroughly cleaning the nozzle before each printing session is essential.
Begin by wiping the hot nozzle exterior with a damp cloth, and if necessary, use a wire brush or a small blade to remove any remaining material. Address the interior by carefully inserting a small needle to clear debris, considering the cold pull method if needed. If issues persist after these cleaning methods, nozzle replacement may be necessary. Heat the hot end to melt any stuck material, remove the filament fed into the extruder, and replace the nozzle once all residual material is eliminated.
Finally, clean the hot end with a small metal pick before attaching the new nozzle. When connecting the new nozzle, screw it all the way until there is no more room left, and then unscrew the nozzle a turn and a half to allow the filament to run smoothly.
5) Keeping Your Filaments Dry from the Elements
Exposure to moisture in the air can harm 3D printing filaments, particularly leading to stringing issues. When moisture is present, it can transform into steam upon heating, mixing with the plastic and increasing the likelihood of oozing during non-print movements. While PLA & PETG are especially prone to moisture absorption, all FDM 3D printing filaments exhibit some degree of hygroscopic behavior.
Severe stringing indicates wet filament, but the good news is that you can effectively dry your filament for printing. One method involves using a filament dryer, such as the Sovol SH01 or the Sunlu FilaDryer S1, which heats the filament in a controlled environment, evaporating moisture. Alternatively, you can use an oven to ensure it reaches the appropriate glass transition temperature for your filament and leave the spool inside for four to six hours. If an oven is unsuitable, a food dehydrator can also be employed.
After proper drying, storing the filament in a moisture-free environment is essential. Consider options like airtight boxes, desiccant packs, or vacuum storage bags. Dedicated dry boxes like the Polymaker PolyBox or a DIY solution, such as a Rubbermaid storage container, are effective storage solutions.
keywords: stringing 3d prints top 5
For more information about this particular topic, click the link here:
Commentaires